
PR
簡単手順!PremiereProの音量調整はコレを押さえとく!
動画を作る際に音の調整はしていますか?
私はしばらく音の調整をしていませんでした。が、色々な動画と比べると「自分の動画は音のバラツキがあってなんか嫌な感じがするな…」と思ってから音の調整をするようになりました。
実際に音の調整をするようになってから、少しずつYoutubeの再生回数やチャンネル登録者が増えてきているので、やはり音の印象というのは重要です。
この記事では、簡単ステップでできる、Premiere Proでの音の調整について説明していきます。
 クマ
クマ音の調整をして、観ていてストレスのない動画作りを目指そう!
動画の方がいい!という人はYoutubeも公開しているので、こちらをご覧ください!
目次
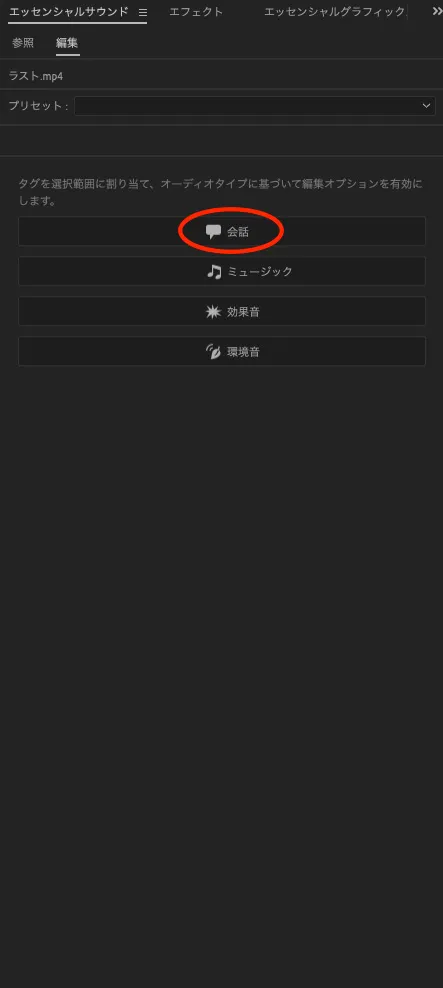
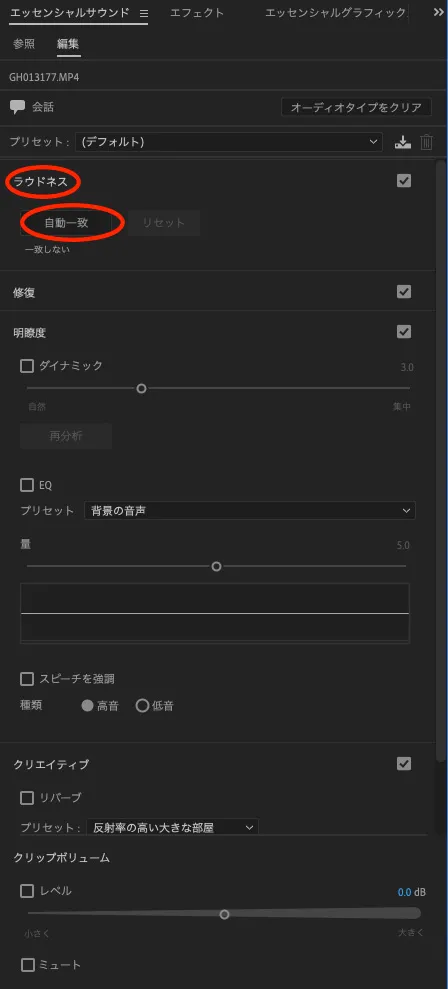
まずはエッセンシャルサウンドで「ラウドネスの自動一致」
色々と設定できる項目がありますが、今回は「エッセンシャルサウンド」→「会話」→「ラウドネスの自動一致」をクリックして、音量を自動調整します。
 クマ
クマ素材の長さによってはちょっと処理に時間がかかるかもしれません。が、これだけでもある程度音量のバラツキを抑えることができます。
ですが、これだけだと、まだ素材ごとに音量にバラツキがある状態です。
このあと、サウンドエフェクトの「ダイナミック」を使ってさらに細かく調整していきます。
下準備
音の調整をするときに、その素材の特定の場面(その素材の平均的な音の場面)を選んでそこの音を基準に調整していきます。
そのときに、その場面を繰り返し再生して、音量を聞きながら調整する必要があるのですが、「ループ再生の設定」と「インポイント・アウトポイントの設定」をしていきます。
ループ再生の設定
ループ再生の設定をします。
クマまぁ、ループ再生のアイコンを出してクリックしておくだけです。
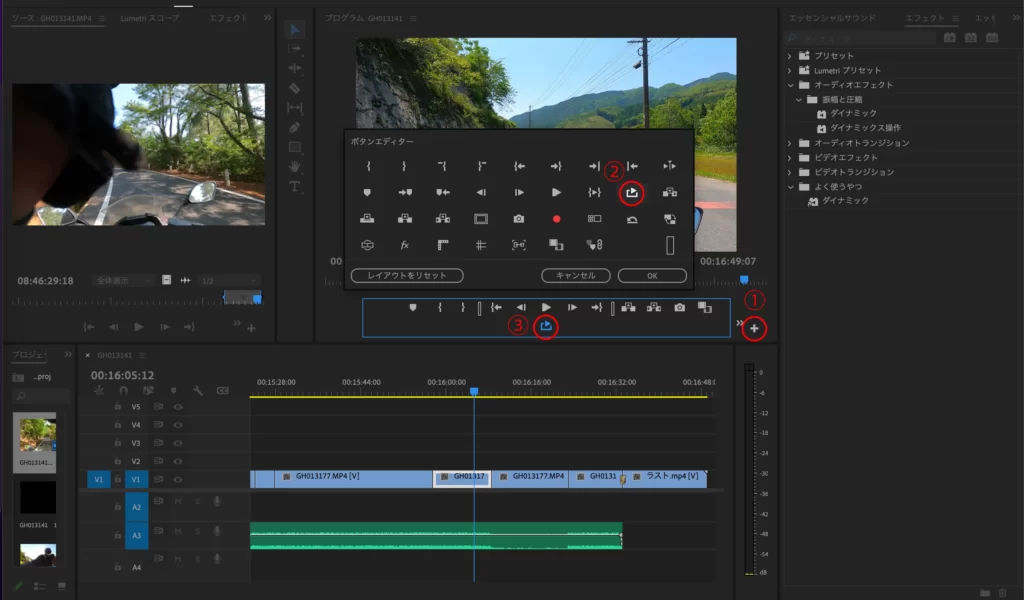
- プログラムモニターの「+」をクリック。
- 「ループ再生」アイコンをツールボタンエリアにドラッグアンドドロップ。
- 配置された「ループ再生」アイコンをクリック。
 クマ
クマですが、これだけでは特定の場所を繰り返し再生できません。
インポイント・アウトポイントの設定
繰り返し再生をしたい場所の最初でインポイント「{(インをマーク)」を、最後でアウトポイント「}(アウトをマーク)」をクリックします。
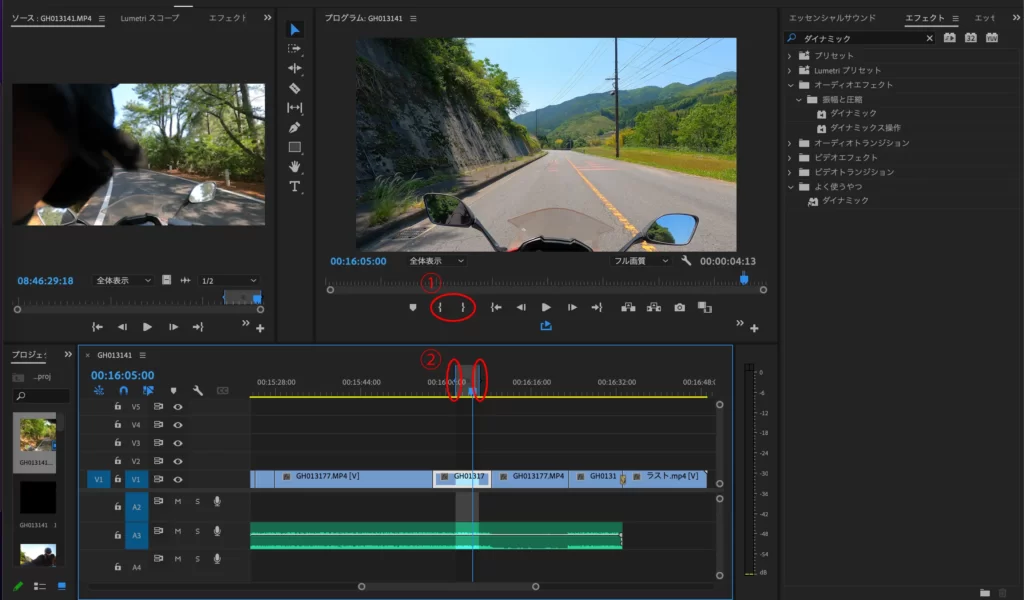
この状態で再生するとインポイントとアウトポイントの間のループ再生が始まります。
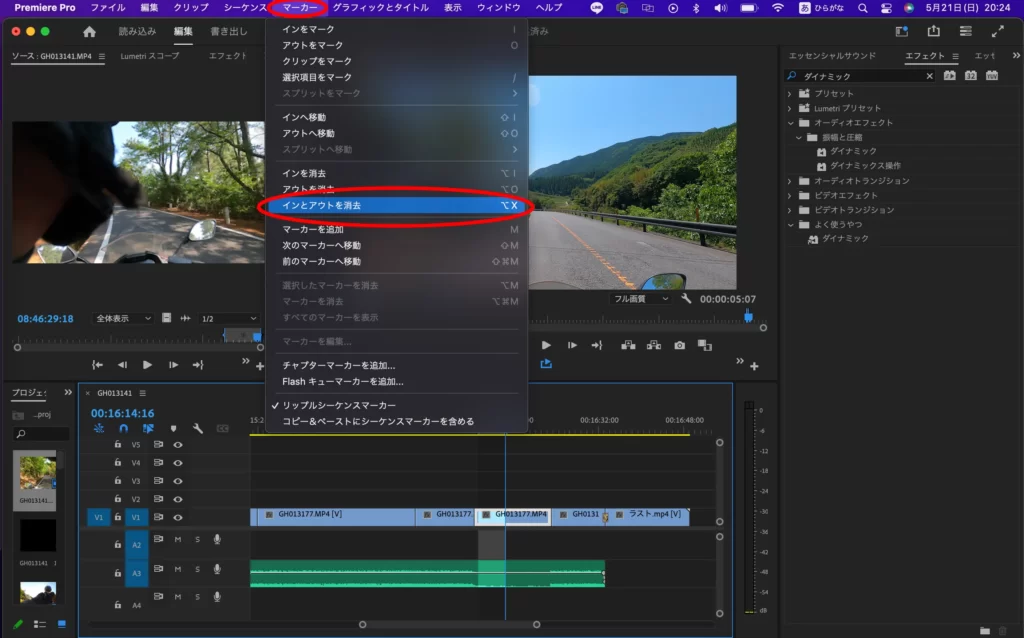
ちなみに、「マーカー」→「インとアウトを消去」すればインポイント・アウトポイントの設定を消去できます。
 クマ
クマショートカット「I(アイ)」でインポイントをマーク、「O(オー)」でアウトポイントをマーク、「opt+X(WindowsならCtrl+Shift+X)」でインとアウトを消去できます。このショートカットはよく使いますね。
この後、インポイント・アウトポイントを設定して、ループ再生しながら音量の調整を行っていきます。
サウンドエフェクト「ダイナミック」を使いこなせ!
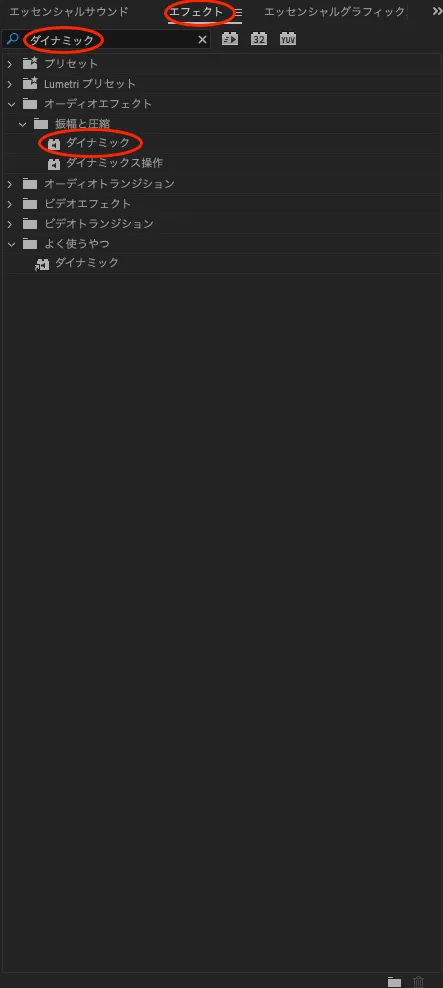
まずは、エフェクトから「ダイナミック」と検索して、タイムラインの素材にドロップアンドドロップで適応してあげます。
エフェクトが適応できたら、その素材を選択して、「エフェクトコントロール」→「ダイナミック」→「カスタムセットアップ」の編集を選びます。
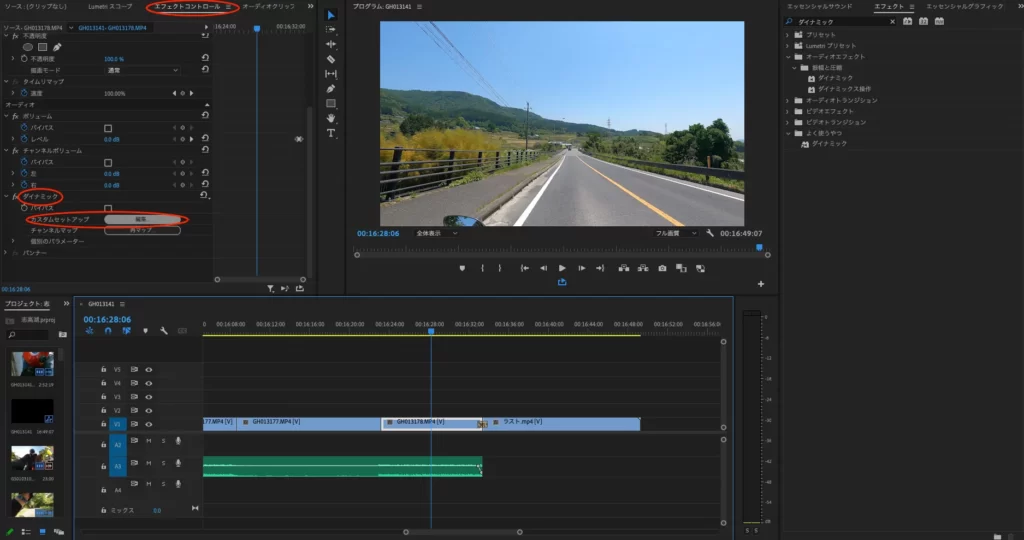
すると、次のような画面が現れるはずです。
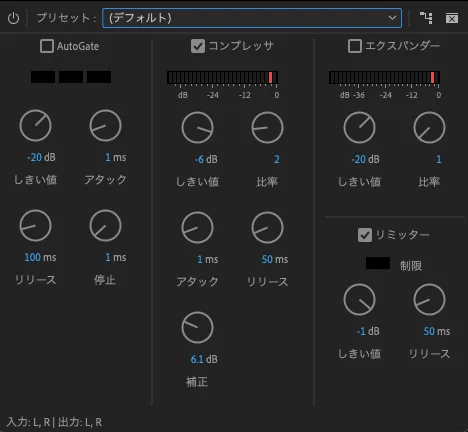 クマ
クマこいつをいじって音の調整をしてやります!
前提として、YoutubeなどのSNSの音量は-6db前後で調整するのがいいです。
クマなので、この記事でも-6dbを基準に音量調整をしていきます。
「コンプレッサ」で音量圧縮
コンプレッサにチェックを入れて、各項目を設定していきます。
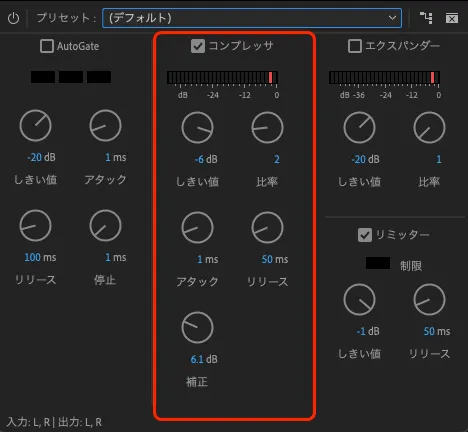 クマ
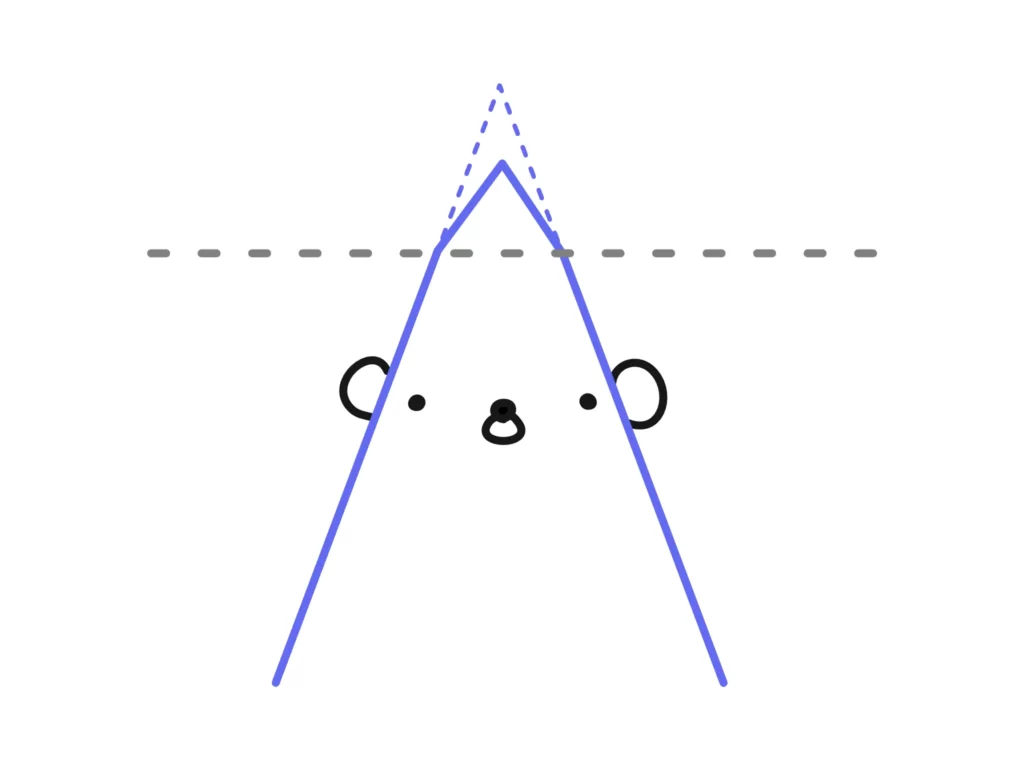
クマコンプレッサでは、しきい値を超えた音量について、圧縮をかけて、急な音量の変化を抑えます。あとは補正で音の底上げができます。
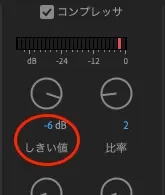
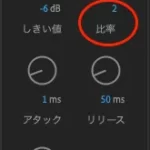
しきい値とは?
このラインを超えたら圧縮を掛けるよ、というボーダーラインです。
まずはこのラインを設定します。
クマ先ほど述べたように−6db基準で音量調整をしていくので、このしきい値についても「−6db」を指定することをオススメします。
圧縮
圧縮率を設定していきます。
しきい値を超えた音量について、「何倍に圧縮するか」を指定します。1〜8を指定できますが、普通は2〜4程度に設定することが多いです。
クマ圧縮率を上げるほど、急な音声変換には強くなりますが、反面、抑揚がなくなるというデメリットもあります。
参考までに、私は音声が安定している状況では「2」、音声が安定していない状況では「3」で設定しています。
アタック・リリース
コンプレッションの効き始めと効き終りの早さを設定します。基本的にデフォルトで問題ないです。
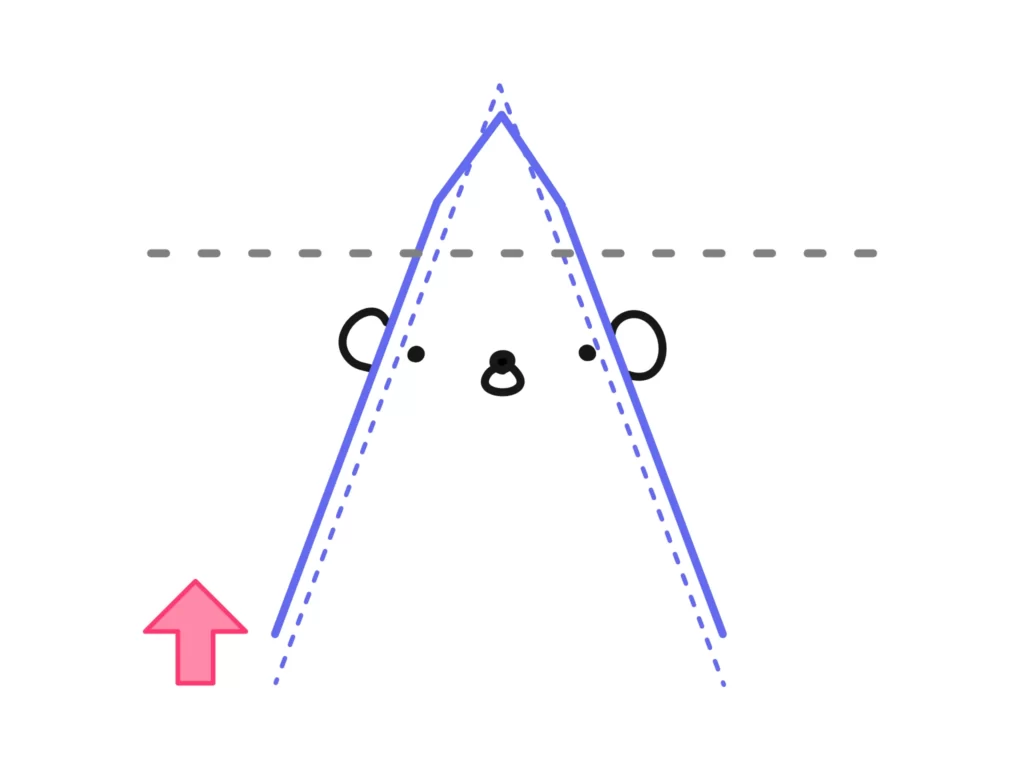
補正
ここまで設定したら、補正で音量の底上げをしていきます。
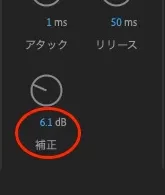
ここでポイントになるのは、そのクリップの平均的な音量の部分を選んで底上げをしていく、ということです。
 クマ
クマとはいえ…ぶっちゃけ結構適当です。そのクリップで「普通に音が出てるな」と思うところを雰囲気で選んでいただければOKです。
事前準備のインポイント・アウトポイントの操作をして、平均的な音量の部分を繰り返し再生します。
再生しながら大体音量の平均が-6dbになるように底上げしていきます。
リミッター
リミッターは「これ以上の音量は絶対カット」というボーダーラインです。
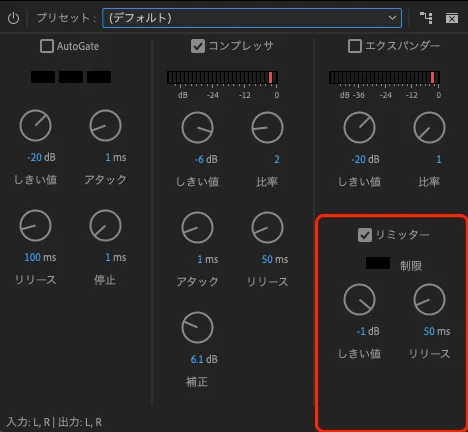
コンプレッサで底上げした場合、急な音量変化があるところで音が大きくなる可能性があるので、万が一にそなえてリミッターをかけておくと安心です。
クマどんなに音量変化があってもリミッターはやぶられません!
最終防衛ラインですね!
一応これにチェックを入れて、音割れを防ぎます。
しきい値
ここの「しきい値」より上の音は強制カットになります。
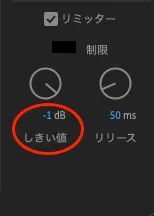
 クマ
クマここまでの調整で、大体音の粒が揃って、急な音量変化があってもリミッターが効くようになっているはずです!
ここまでの「ラウドネスの自動一致」→「ダイナミックの設定」で大体音の調整は完了です。
クマもう少し他のエフェクトなどで細かく音の調整もできますが、ここからは沼にハマりかねないので、特にこだわりがなければこのくらいの音調整がちょうどイイんじゃないかな、と思います。
まとめ
今回はPremiere Proで具体的な音量設定について説明しました。
ちょっと面倒な作業ではあるのですが、動画のデキにおいて音が占める割合というのは案外大きいです。
音の調整がちゃんとできている動画を観ていると気づきにくいのですが、できていない動画を観たら、その重要性がわかるはずです。音の調整ができていない動画は、ちょっとストレスを感じてしまいます…。
本格的な音の調整ではありませんが、この記事でやっていることを押さえておけば、とりあえずストレスを感じないくらいの音には仕上がると思いますので、ぜひやってみてください!
クマちなみに、左手デバイスがあると効率爆上がりです!ぜひこちらの記事もご覧ください!
あわせて読みたい


最強の左手デバイスTourBoxが超便利!【使い倒すためのコツや設定も】
左手デバイス…皆さんは使っていますか? 興味はあるけど…ホントに使えるの?あんまり意味ないんじゃない? という方に、TourBoxをオススメします! こちらの記事でXPPen…
あわせて読みたい
PremiereProの価格は高い!?安く使う方法!【今すぐ試して欲しい】
皆さんは動画編集ソフトに何を使っていますか? 私は色々なソフトを回り回って、現在はAdobeのPremiereProを使っています。 その辺りの経緯はこちらの記事に書いていま…