
PR
こもった声をPremiere Proで修正!!パラメトリックイコライザーの使い方
今回は音編集シリーズです。
Youtubeでツーリング動画を公開しているのですが、こもったような音になるのが悩みの種でした。
ですが、Premiere Proは音の編集も得意!こもった音も「パラメトリックイコライザー」というエフェクトである程度解消できますので、今回は「パラメトリックイコライザー」の使い方を解説していきます。
「解説は動画見た方が手っ取り早い!」という人はこちらをどうぞ。
目次
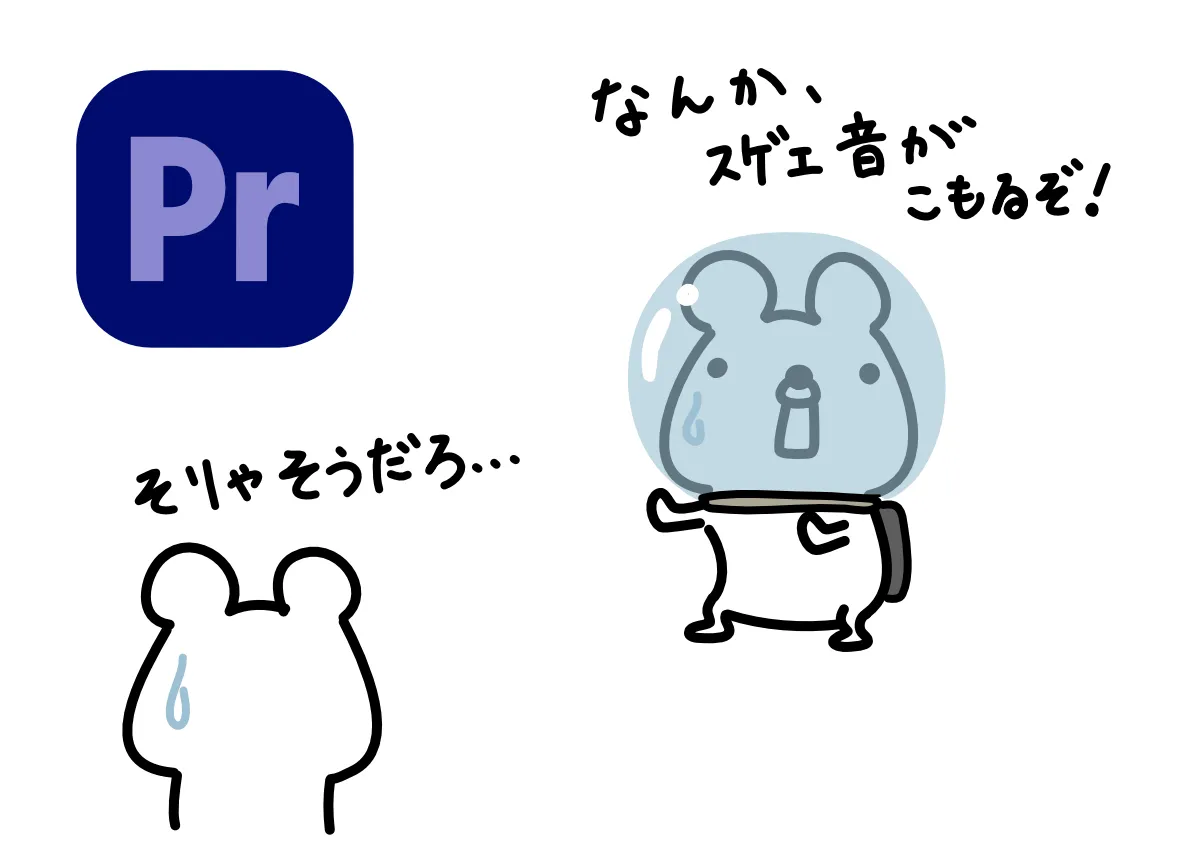
こもった音声になる
元も子もないことを言ってしまうと、こもった音声になる場合、マイクの位置や周囲の状況、場合によってはマイク自体を変えた方がいいと思います。
私はもともと、Audio-technicaのピンマイクAT9904を使っていました。
リンク
ですが、やはり音声のこもりが気になるので、効果があるかわからなかったのですが、同じくAudio-technicaのピンマイクAT9901に変えました。
リンク
このピンマイクに変えることで、劇的に音が変わっています!
 クマ
クマAT9901、コスパもよくてオススメです!比較検証動画も撮っているので、よろしければご覧ください!
ただ、AT9904(以前使っていたピンマイク)の性能自体が悪いというわけではなく、恐らくこのこもり具合は「全指向性」だからではないか、と思われます。
 クマ
クマ全指向性のマイクをヘルメットに突っ込んだら、そりゃこもった音になりますよね。
要は私の使用状況が特殊(ツーリング動画だからヘルメット内にピンマイクを装着する)なので、全指向性のマイクはあまり適さなかった、ということですね。
一方、AT9901(新しく買った方)は単一指向性なので、こちらの方がヘルメットの中の音声を撮ったり、外を歩きながら撮ったりするのに向いている、ということですね。
クマ今はAT9901の方を使っていますが、AT9904も使えそうなので大事にとっています。要は使い方によってマイクも換えましょう、ということですね…。
「パラメトリックイコライザー」で編集してみる
とはいえ、撮影の環境などで「この素材、ちょっと音がこもってるなぁ…」ということもあると思います。
そんなときはエフェクトの「パラメトリックイコライザー」を使って調整していきます。
クマただ、こちらも偉そうに解説するほど難しいものではありません…。
STEP
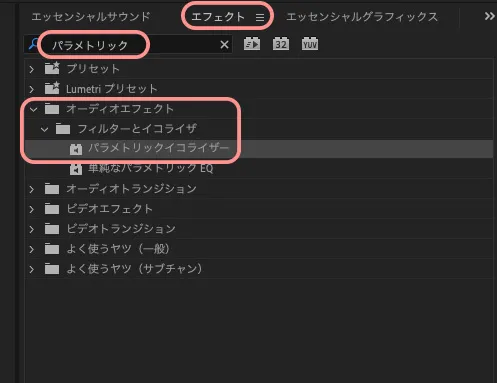
エフェクトを検索&適用
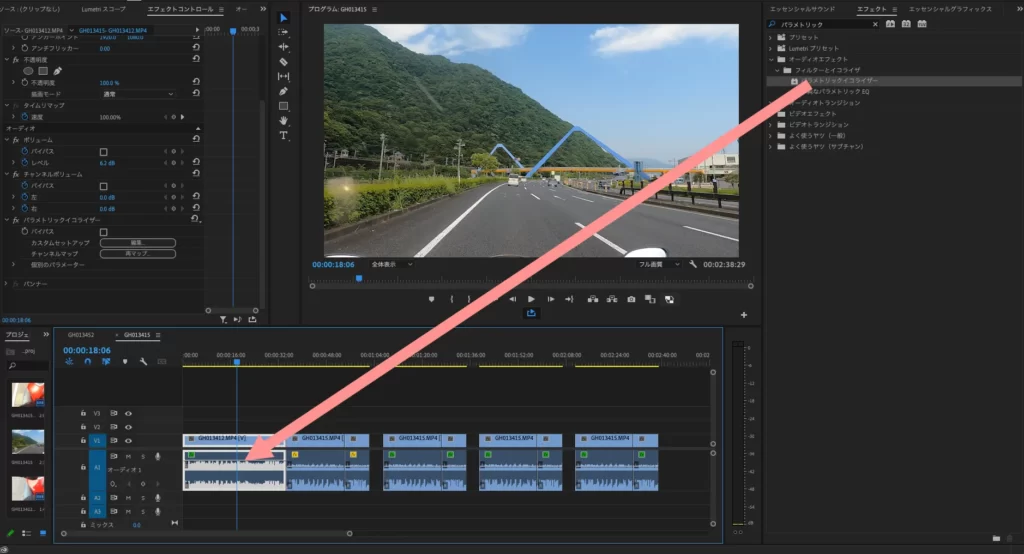
エフェクトの検索窓で「パラメトリックイコライザー」と検索して、ドラッグ&ドロップで適用させてあげます。
 クマ
クマ「オーディオエフェクト」→「フィルターとイコライザー」→「パラメトリックイコライザー」と辿っていってもOKです。
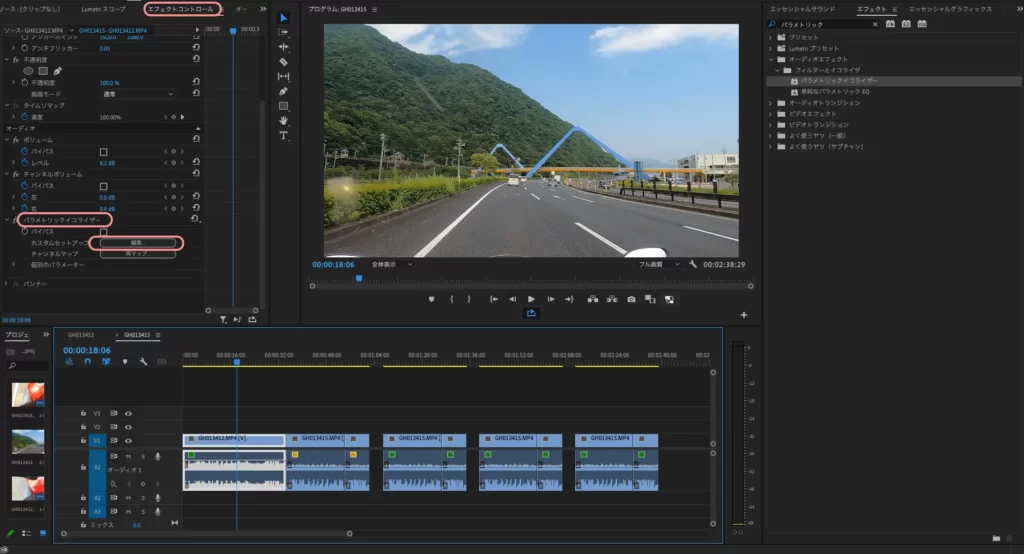
適用したら、その素材を選んで、「エフェクトコントロール」の「パラメトリックイコライザー」にある「編集」をクリックします。
STEP
調整
音声のこもりは中低音の膨らみすぎが原因、と言われています。
クマで、AT9904(以前のピンマイク)で撮った波形を確認してみると…。
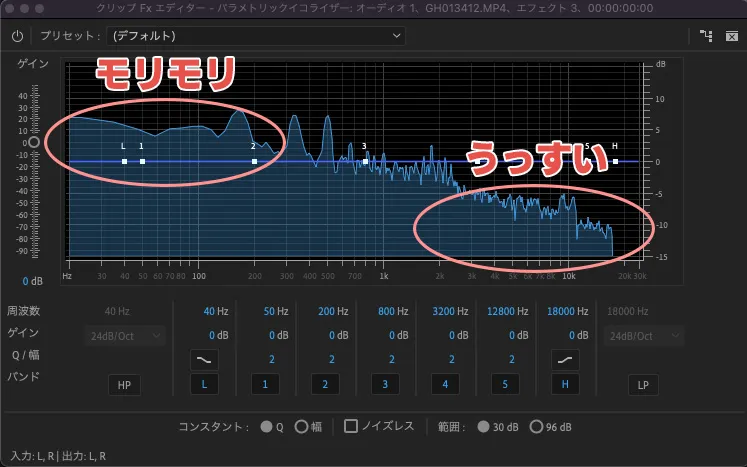
 クマ
クマめっちゃ低音モリモリ…。というか、高音が薄すぎ…。
ということで、低音を下げて、中・高音を持ち上げてみます。各ポイントをグイッと持ち上げたり下げたりするだけです。
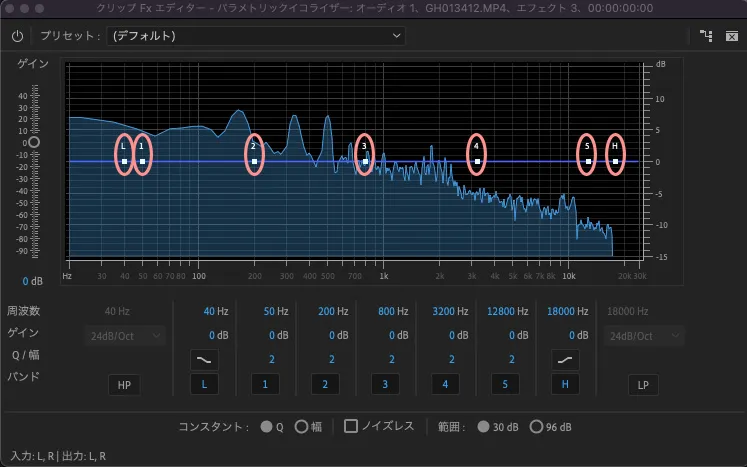
今回はポイントの「L」(一番低音)を下げて、「3」「5」を上げてみました。
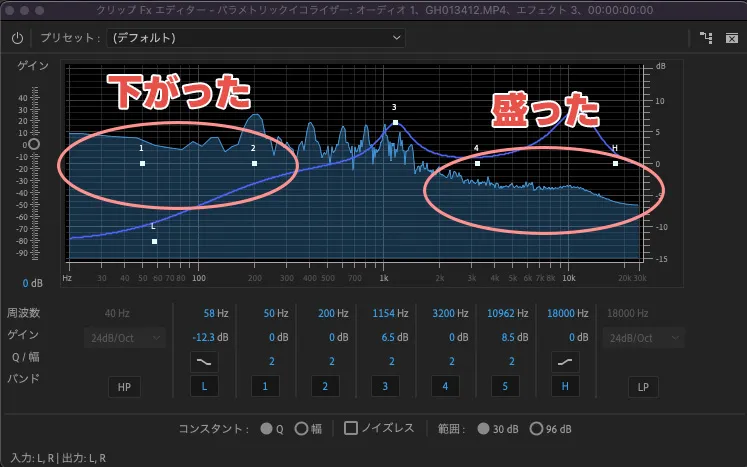
声が抜ける感じが増して、聴きやすくなります。実際に聴きながら調整してみてください!
まとめ
Premier Proで、エフェクト「パラメトリックイコライザー」を使ってこもった音声を修正する方法を解説しました。
音の編集はハッキリ言って難しいです…。正直編集でどうにかしようとするより、マイクにこだわった方が手っ取り早い気がします。
クマ比較動画を見てくれたらわかりますが、マイクによって全然音の録れ方が違います。今では早くマイク換えればよかった、と思ってます。
バイクブログの方でもマイク紹介をしています!
全然音が違いますよ!
あわせて読みたい

【OT】バイクでGoPro!音の拾い方「外部マイクや風切り音は?」
バイク動画をGoProで撮っていて「音をどうやってとろうか…」と疑問に持っている人へ。「メディアモジュラー」+ピンマイクをオススメします!実際に使用してのレビューやメ…
思い切ってマイクを換える、というのも検討してみてはいかがでしょうか?
あわせて読みたい
Premiere Proで音声ノイズが簡単に除去できる!
今回は音調整です。 Premiere Proで音声に入ったノイズを除去する方法を解説していきます。 「エッセンシャルサウンド」を使った簡単ノイズ除去とエフェクト「クロマノ…
あわせて読みたい
PremiereProの価格は高い!?安く使う方法!【今すぐ試して欲しい】
皆さんは動画編集ソフトに何を使っていますか? 私は色々なソフトを回り回って、現在はAdobeのPremiereProを使っています。 その辺りの経緯はこちらの記事に書いていま…